

The waitlist workflow for dockmasters is the DockMaster process for capturing slip demand you can't fill today: create a Wait List record, add each prospect to it with their contact and vessel details, monitor the Wait List Report for movement, then promote or assign prospects as slips open up. It runs on four repeatable steps.
- Create the list under Marina Management → Wait List Functions → Wait List Maintenance.
- Add prospects with a linked customer record, vessel size, and slip preference.
- Monitor the report under Marina Management → Wait List Functions → Wait List Report.
- Promote or assign the next eligible prospect the moment a slip cancels or opens.
Everything below walks through each step in DockMaster, plus the operating rules that turn a waitlist from a parked spreadsheet into a working revenue tool.
Key Takeaways
The DockMaster waitlist workflow works because it pairs a structured record (Wait List ID, description, prospect) with a monitored report and enforced acceptance rules, not because of any single feature in isolation.
| Point | Details |
|---|---|
| Creation requires three fields | Save a new list only after entering a Wait List ID, description, and at least one prospect. |
| Menu path is fixed | Find both list creation and reporting under Marina Management → Wait List Functions. |
| Verification needs a deadline | Set a defined window, such as five working days, for ID and confirmation before flagging stale entries. |
| Acceptance windows should be short | Use a 24 to 72 hour response window and cascade offers automatically on expiry. |
| Atlantis Marina automates the cascade | The platform offers open slips to the next eligible prospect automatically and reports waitlist volume by slip type on a live dashboard. |
Table of Contents
- How Do You Create a Wait List in DockMaster?
- How Do You Add and Maintain Waitlist Entries?
- Where Do You Run the Wait List Report?
- What Best Practices Keep a Waitlist Running Smoothly?
- What This Workflow Gets Wrong in Most Marinas
- How Atlantis Marina Handles Waitlist Automation for Dockmasters
- Sources
- FAQ
How Do You Create a Wait List in DockMaster?
Start at Marina Management → Wait List Functions → Wait List Maintenance. This is the single entry point DockMaster uses for building and managing every wait list your marina runs, whether it's for wet slips, dry rack storage, or a specific dock section.
- Open Wait List Maintenance and select "New" to start a fresh list.
- Enter a Wait List ID, a short code that identifies the list in every report you pull later.
- Enter a Description that spells out what the list covers, for example "RACK 30FT" for a 30 foot dry rack queue or "WET DEEPWATER" for a deepwater wet slip line.
- Add at least one prospect before saving. DockMaster requires a prospect, a Wait List ID, and a description before it will let the record save, so have your first applicant's basic details ready before you start.
Marinas running four or five separate lists (wet slips by length, dry stack by height, seasonal versus annual) benefit from consistent naming from day one. A list titled "Wet Slip Waitlist" without a size or depth reference becomes useless the moment you're trying to pull a report and figure out which prospects fit a 45 foot slip that just opened.
Pro Tip: Build your Wait List ID convention around slip type plus size band (e.g., WET40, RACK25) before your first list goes live. Renaming lists later means re-tagging every prospect record by hand.
How Do You Add and Maintain Waitlist Entries?
Once the list exists, adding a prospect means either linking an existing customer record or creating a new one, then attaching that record to the specific Wait List ID with a description of what they're waiting for. The entry itself needs enough detail that whoever pulls the report six months from now can act on it without calling the prospect first.
Capture these fields on every entry:
- Full contact information, including a phone number that supports SMS
- Vessel length, beam, and draft, plus slip type preference
- Notes on flexibility (will accept a shorter slip, needs power/water hookups, seasonal versus year round)
- An ID verification indicator showing whether a photo ID or registration copy is on file
Verification matters more than most dockmasters treat it. A workable standard, borrowed from public marina policy, is collecting photo ID and confirming intent within a defined window, similar to the five working day sign-in requirement Dana Point Harbor uses for its own waitlist. Applicants who don't respond in that window get flagged, not deleted outright, since a flagged record still shows up in your report for a manual follow-up call.
For duplicates and multi-list applicants (someone waiting on both a wet slip and a dry rack spot), link the same customer record to both Wait List IDs rather than creating a second customer profile. That keeps billing history, documents, and contact details in one place when the prospect finally gets a slip.
Where Do You Run the Wait List Report?
The Wait List Report lives at Marina Management → Wait List Functions → Wait List Report, and it's the tool that turns individual entries into something you can actually manage. Running it pulls a current list of wait list entries tied to whichever Wait List ID or IDs you select, with position, contact details, requested slip type, and any notes attached to each entry.
Export it as needed for a weekly manager review. A few things worth checking every time you run it:
- Position changes since last week (who moved up, who dropped off)
- Entries with no ID verification on file after your defined window
- Slip types with the longest backlog, which signals where demand outstrips supply
- Stale entries: prospects who haven't responded to outreach and should be removed or flagged
A weekly manager report built from this export should flag the top two or three waitlisted slip types by volume, note how many stale entries got cleared, and include a short capacity recommendation, whether that's converting an underused dock section or raising the priority on a planned expansion.
What Best Practices Keep a Waitlist Running Smoothly?
A waitlist that just sits there collecting names isn't managing demand, it's deferring a problem. The dockmasters who get real value out of this workflow treat it as an active system with rules, deadlines, and automation, not a static list they check when someone calls asking about their spot.
- Set a published acceptance window. Industry guidance points to 24 to 72 hours as the workable range for a prospect to respond once offered a slip. Shorter windows fill spots faster; longer windows accommodate prospects who travel or need to arrange financing.
- Cascade automatically on expiry. If a prospect doesn't respond in the window, the offer should move to the next eligible entry without a staff member manually re-checking the list.
- Default to first-come-first-served. Document any exceptions, such as marina members or long-tenured customers getting priority, in a written policy every staff member can point to.
- Automate notifications. SMS and email alerts should go out the moment a slip becomes available, and the confirmation step should be one tap or one click, since payment friction or extra steps at acceptance lowers conversion.
- Track waitlist volume by slip type monthly. A persistent backlog for one size or category is a capacity signal worth escalating to operations leadership, not just a queue to manage passively.
Statistic Callout: Waitlist management guides that studied fill patterns found automated systems that instantly promote the next eligible entrant on a cancellation convert far more of those openings into filled slips than manual, spreadsheet-driven processes.
Pro Tip: Publish your response window and priority rules somewhere prospects can see them, whether that's a sign-up form or a printed policy sheet at the dockmaster office. Applicants who know the rules in advance rarely dispute a promotion they miss.
What This Workflow Gets Wrong in Most Marinas
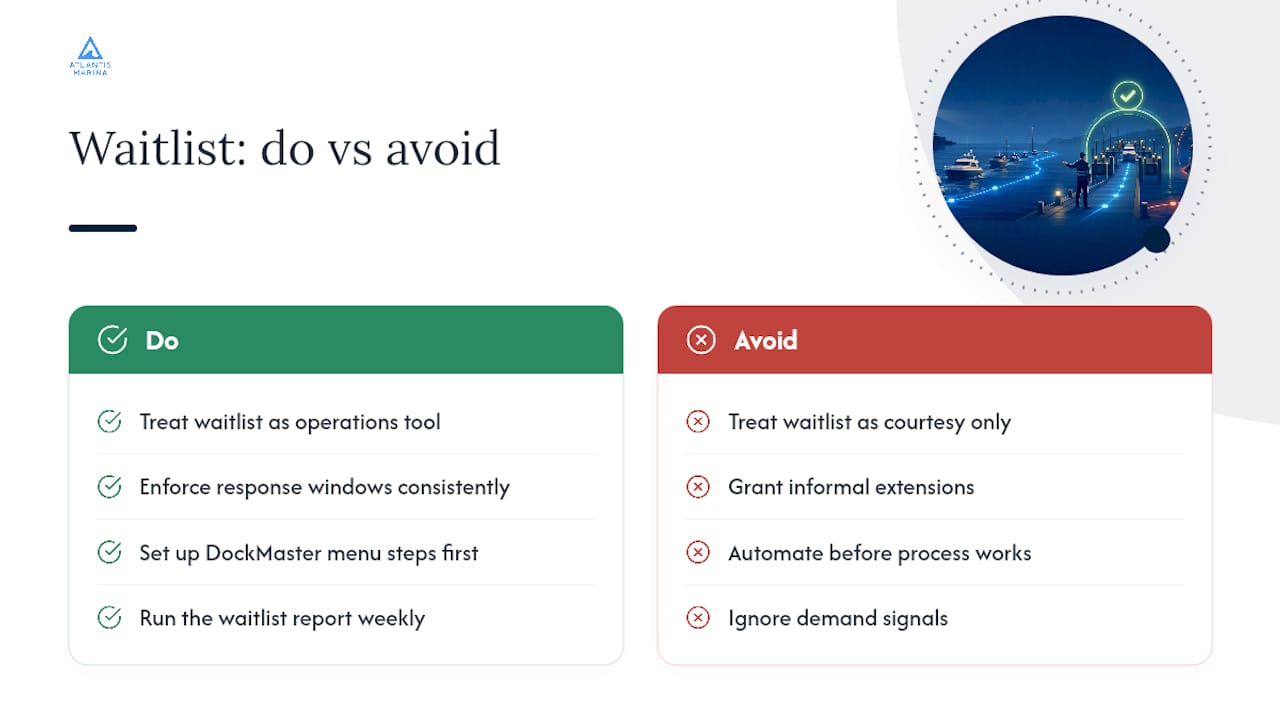
Most marinas treat the waitlist as a courtesy list, not an operations tool. That's backwards. A waitlist with fifteen names for a 35 foot wet slip is a direct signal that your marina is underpriced or undersized for that segment, and ignoring that signal for a season is the real cost, not the administrative work of running a report.
The conventional advice on waitlists (be polite, call people back, keep a list) misses the part that actually matters: enforcement. A response window means nothing if a dockmaster grants informal extensions to whoever calls and asks nicely. Consistency, not courtesy, is what keeps a waitlist fair and fast.
If you're setting this up for the first time, prioritize the DockMaster menu-level steps first (create the list, get the fields right, run the report weekly) before worrying about automation. A well-structured manual process beats a poorly structured automated one. Automation should tighten a workflow that already works, not paper over one that doesn't.
How Atlantis Marina Handles Waitlist Automation for Dockmasters
Atlantis Marina turns the manual cascade described above into something that runs itself: when a slip opens through a cancellation, the platform automatically offers it to the next eligible prospect, tracks the response window, and moves to the next name if there's no reply, all without a dockmaster manually rechecking a report.
Notifications go out by SMS and email the moment a slip becomes available, and prospects confirm from the Atlantis Boater App with a single tap, which matches the frictionless acceptance step that drives higher fill rates. On the staff side, the operations dashboard shows waitlist volume by slip type in real time, so a persistent backlog for 40 foot wet slips shows up as a capacity signal, not a buried spreadsheet column. Document storage keeps ID verification and vessel registration attached to each prospect record automatically.
If your marina is still running waitlists on paper or in a shared spreadsheet, book a demo with Atlantis Marina's sales team to see the cascade and reporting tools running against your own slip inventory.
Sources
- Wait List Report
- Dana Point Harbor waitlist policy (OC Parks)
- Waitlist Management, Guide (2026) | SchedulingKit
FAQ
What Are the Primary Responsibilities of a Dockmaster?
A dockmaster manages slip assignments, waitlists, vessel check-ins, dock maintenance coordination, and billing oversight, acting as the daily operational point of contact between the marina and its boaters.
What Is the Difference Between a Dockmaster and a Harbormaster?
A dockmaster handles day-to-day marina operations like slip assignments and waitlists, while a harbormaster typically holds broader regulatory authority over an entire harbor, including navigation, safety enforcement, and multiple marina facilities.
How Do You Become a Dockmaster?
Most dockmasters start with boating or marina operations experience, then move into the role through on-the-job training in slip management, customer service, and software like DockMaster used to run daily operations.
What Is DockMaster Software?
DockMaster is marina management software used to handle slip assignments, billing, and wait list functions, including creating wait lists and running reports on current wait list entries.
Can DockMaster's Waitlist Process Be Automated?
DockMaster's core waitlist functions are manual by design, tracking entries and reports, but platforms like Atlantis Marina add automated cascading offers, SMS and email notifications, and live capacity dashboards on top of that same workflow logic.